Matter is set to become a new standard in IoT smart home devices. That’s why we prepared a second thorough guide to this solution for engineers and others interested in developing their products. Let’s learn how to set it up properly.
Order Matter devices development services ->
Introduction
In a previous blog post (Getting Started With Matter: Introduction), we learned that Matter is a standard that aims to regulate interactions among popular IoT devices, such as light bulbs, switches, and outlets. Matter’s standardization ensures that vendors don’t require a specific implementation for device setup and control. As we learned in the previous blog post, Matter has a list of common devices and a standard set of commands to control each device. Additionally, the Matter protocol enables interoperability across devices from different vendors. For example, a light bulb developed by one vendor can be controlled by a hub from another vendor.
In today’s article, we will explore the different link media Matter supports and how devices are validated to ensure they adhere to the Matter protocol. Finally, we will demonstrate how to set up and control a matter-enabled device developed by Conclusive Engineering.
Matter Link Media
As we learned in the previous blog post, the following image shows a block diagram of the Matter standard:

As shown in the above diagram, Matter can support several link media. The following list describes each medium in detail and outlines its advantages and disadvantages:
- Ethernet: This medium requires a wired connection to the rest of the network. It requires the least power and mitigates interference experienced when using WiFi. However, a wired network connection may not be feasible due to the location of the IoT device.
- WiFi: This medium is most popular due to its age and ubiquity. Unlike Matter devices that require an Ethernet connection, more flexibility is offered in where this device can be located. However, due to the ubiquity of WiFi, WiFi-enabled Matter devices may suffer from interference and congestion from other WiFi-enabled devices. Another benefit of WiFi is that it offers higher bandwidth, which means that WiFi-enabled Matter devices can be used for more computationally intensive sensing, such as streaming video from cameras. However, the added capabilities afforded by WiFi comes at the cost of increased power consumption. Thus, WiFi-enabled Matter devices may be ideal for scenarios with constant power. WiFi-enabled Matter devices still require setup since an access point needs to be available for the device to connect to, and the credentials of the access point need to be relayed to the device.
- Thread/802.15.4: Thread is a protocol built on top of 802.15.4 for low-power mesh networks. Matter over Thread is becoming increasingly popular due to its lower power requirement, ad-hoc capabilities, and reduced chance of interference compared to WiFi. Thread doesn’t require setting up an access point and relaying the credentials of the access point to the Matter device. Instead, a Thread Border router, such as a Google Nest Hub 2, must be present to serve as a bridge between the WiFi network and the Thread-enabled Matter devices. Due to the low power requirements offered by Thread, it is ideal for battery-operated devices to relay low-duty-cycle sensor data.
CSA Certified Devices
As we discussed previously, Matter is a standard that allows devices from different vendors to communicate with one another. The Connectivity Standards Alliance (CSA) is the standard body that developed Matter and is responsible for ensuring that devices that claim to support the Matter standard actually do. This standardization process ensures that devices from different manufacturers claiming to support Matter can seamlessly communicate. As we learned in the previous blog post, Matter supports different categories of IoT devices. The following list describes some of these categories and the vendors that offer devices within these categories:
· Smart bulbs and light strips: Brands like Nanoleaf and TP-Link offer Matter-compatible smart bulbs and light strips.
· Smart plugs and switches: TP-Link and Eve Systems provide Matter-enabled electrical outlets and switches that can be remotely controlled.
· Climate control: Matter-enabled thermostats, air purifiers, and fans offered by companies like Google allow for remote climate control.
· Security and access: Smart door locks from brands like Yale and Aqara are Matter-compatible, providing secure and versatile access control. Additionally, Matter-enabled security sensors offer enhanced security and automation for a complete security system.
· Home Entertainment: Devices like the Apple Homepod Mini, Google Nest Hub, and Amazon Echo Show support Matter. These devices allow users to control their Matter-enabled devices from a central location. Some television models from LG and Samsung also incorporate Matter support.
· Appliances: Recent updates to the Matter standard have expanded support to include household appliances.
As we can see from the above list, more prominent vendors and manufacturers are well-represented in the list of certified Matter devices. This is because the certification cost can be beyond the reach of smaller organizations, such as startups. The typical certification expenses include a one-time cost of up to 13000 USD and an annual membership fee to the CSA that can reach 7000 USD. However, startups and smaller organizations have an alternative mechanism to test and validate their product with a Matter-enabled hub, which we will see in the next section.
Conclusive Engineering Matter Thread Demo
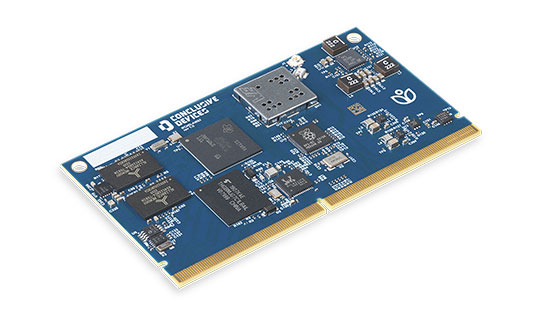
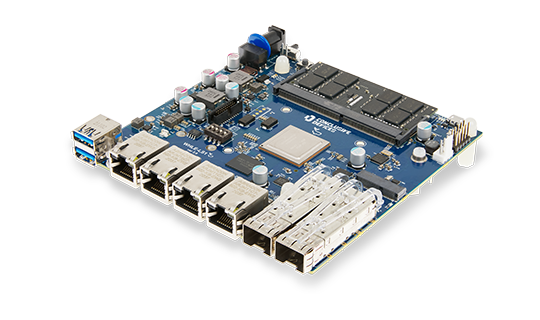
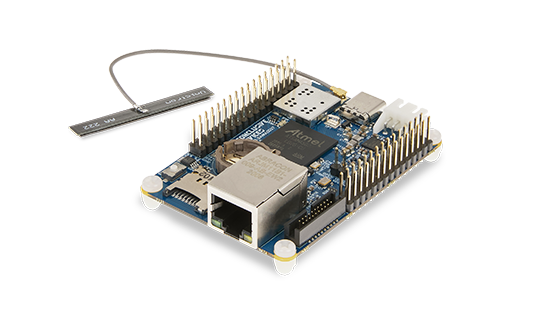
In this section, we will demonstrate adding a Matter-enabled device that uses Thread to our Google Home ecosystem. Specifically, we will be adding the following device offered by Conclusive Engineering, which can control a light bulb:


We will see how to pair the device to our Google Nest Hub 2, which can serve as a Thread Border router, add the device to our Google Home ecosystem, and turn the light bulb on and off from the Google Home app.
We will see how to pair the device to our Google Nest Hub 2, which can serve as a Thread Border router, add the device to our Google Home ecosystem, and turn the light bulb on and off from the Google Home app.
Since this device is in the initial stages of development and has not been certified by the CSA, we will need to add it to the Google Developer Console before we can commission it using the Google Home app. The following describes the steps to add the device to our Google Developer Console:
- Navigate to https://console.home.google.com/u/2/projects and click on “Create a project,” as shown below:
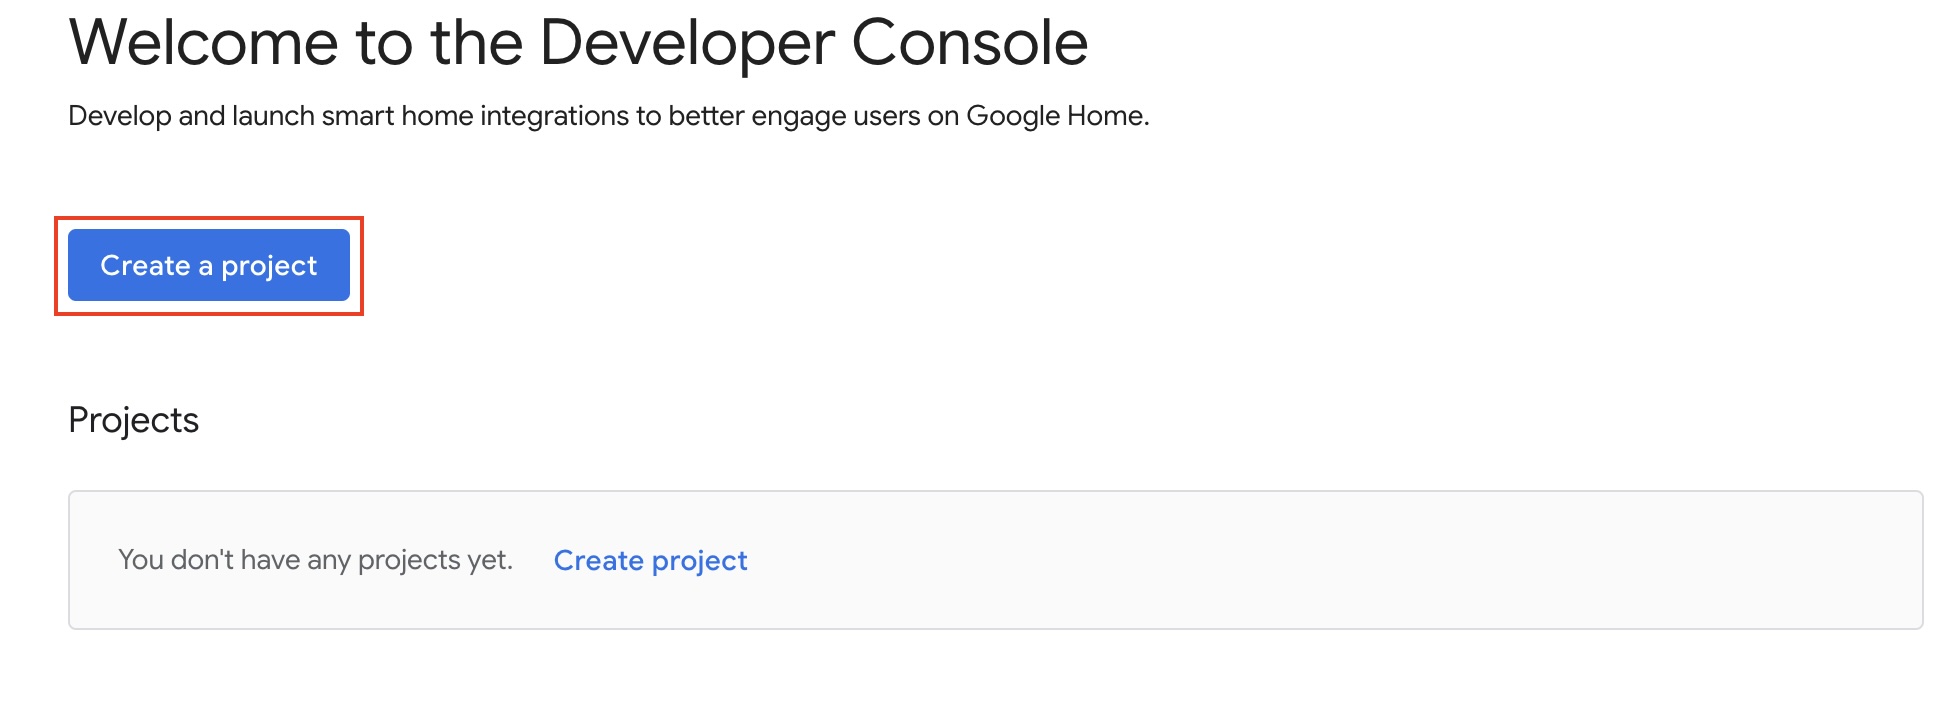
- In the subsequent screen, click on “Create project” as shown below:

- In the following screen, enter a name for your project and click on “Create project” as shown below:

- Then, in the subsequent screen, click on “Add Matter Integration,” as shown below:

- After clicking “Next” two times and navigating past the documentation (you’re welcome to read it further if you wish to understand further details), enter the appropriate information in the screen that follows, and click “Save & continue”:
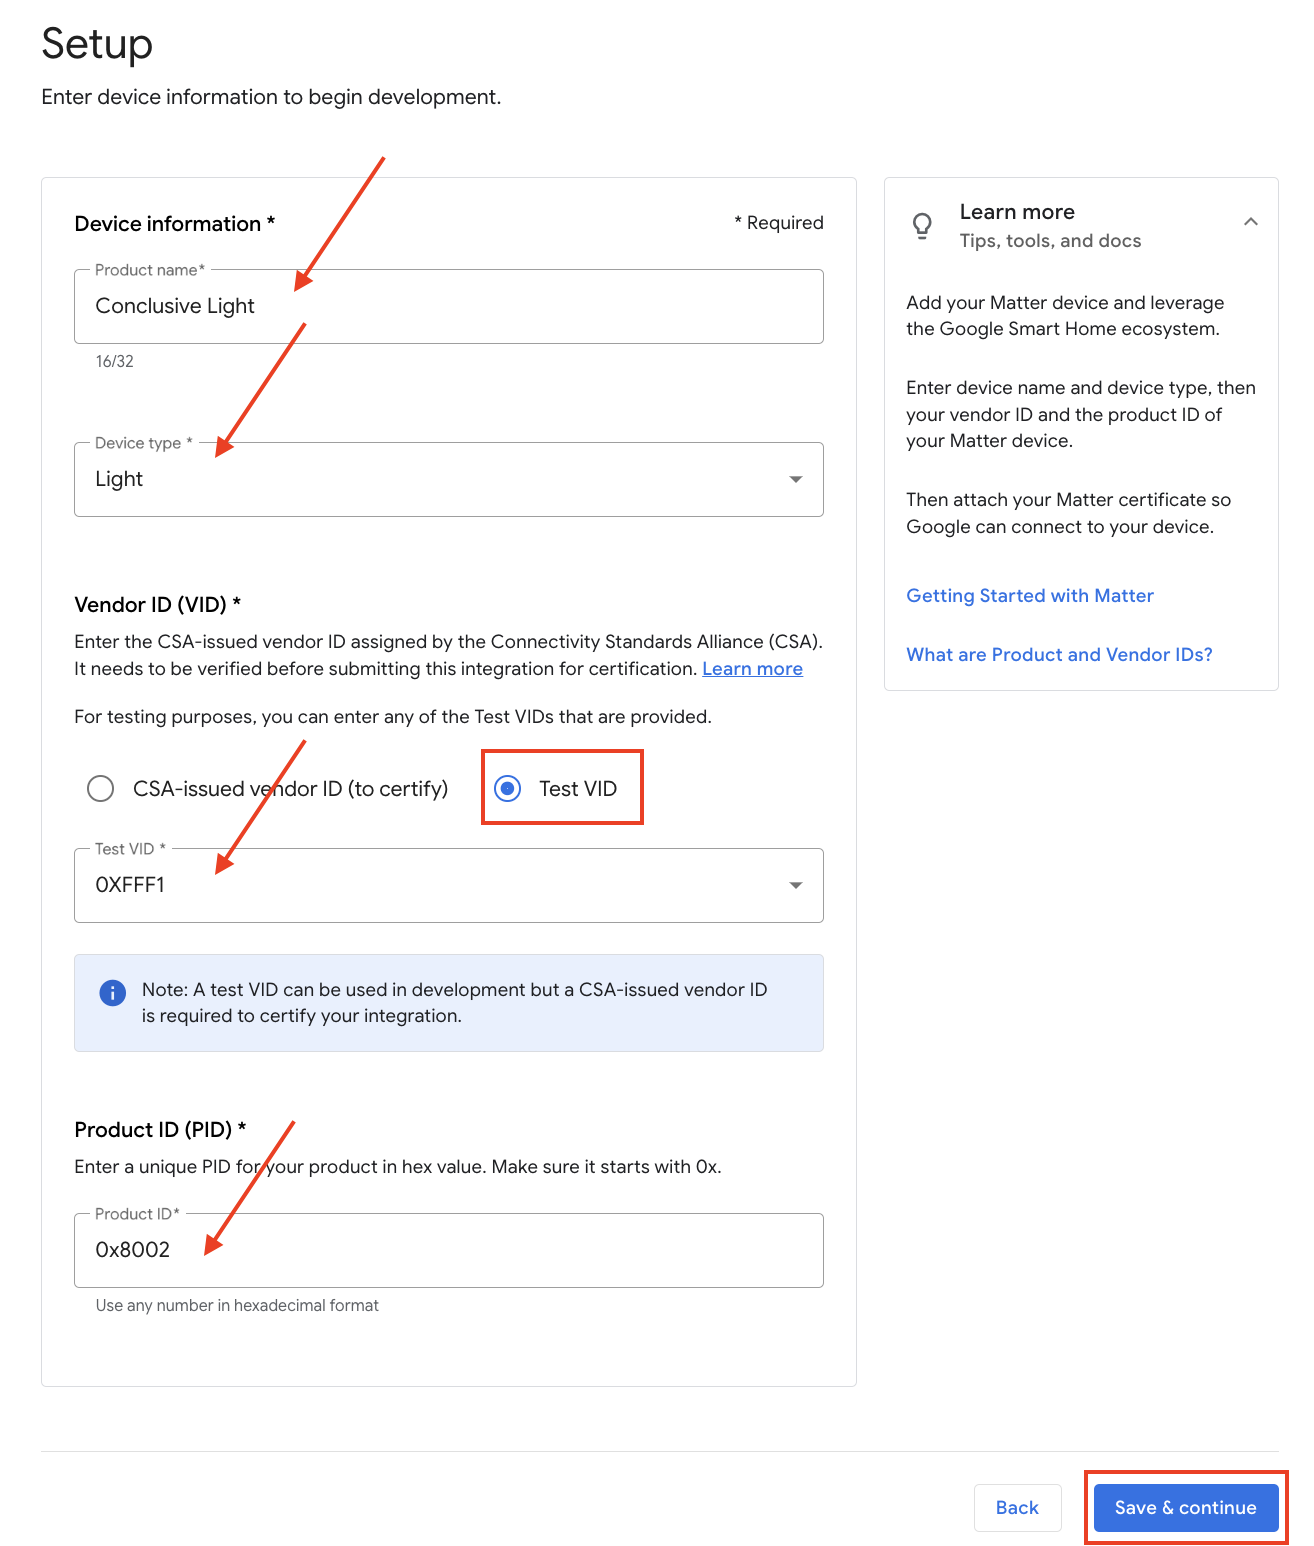
- Product Name: Enter the product name you’re connecting (“Conclusive Light” in this example).
- Device Type: Select “Light” from the drop-down menu (remember that Matter provides a set of devices supported by the standard).
- Vendor ID (VID): Ensure that “Test VID” is selected since Conclusive’s product is not certified by the CSA. You can choose from the set of Test VIDs (0xFFF1 in this example).
- Product ID (PID): Enter 0x8002 (the product ID used in the device’s firmware, so it must match in the console).
6. Click “Save” on the next screen to set optional branding settings.
7. You should see the device appear in the Google Developer Console, as shown below:

Next, we will add the device to our Google Home ecosystem using the Google Home app, using the steps outlined below, and control the light bulb over Thread using our Google Nest Hub 2nd Generation (Note: Google Nest Hub 1st Generation DOES NOT support Thread):
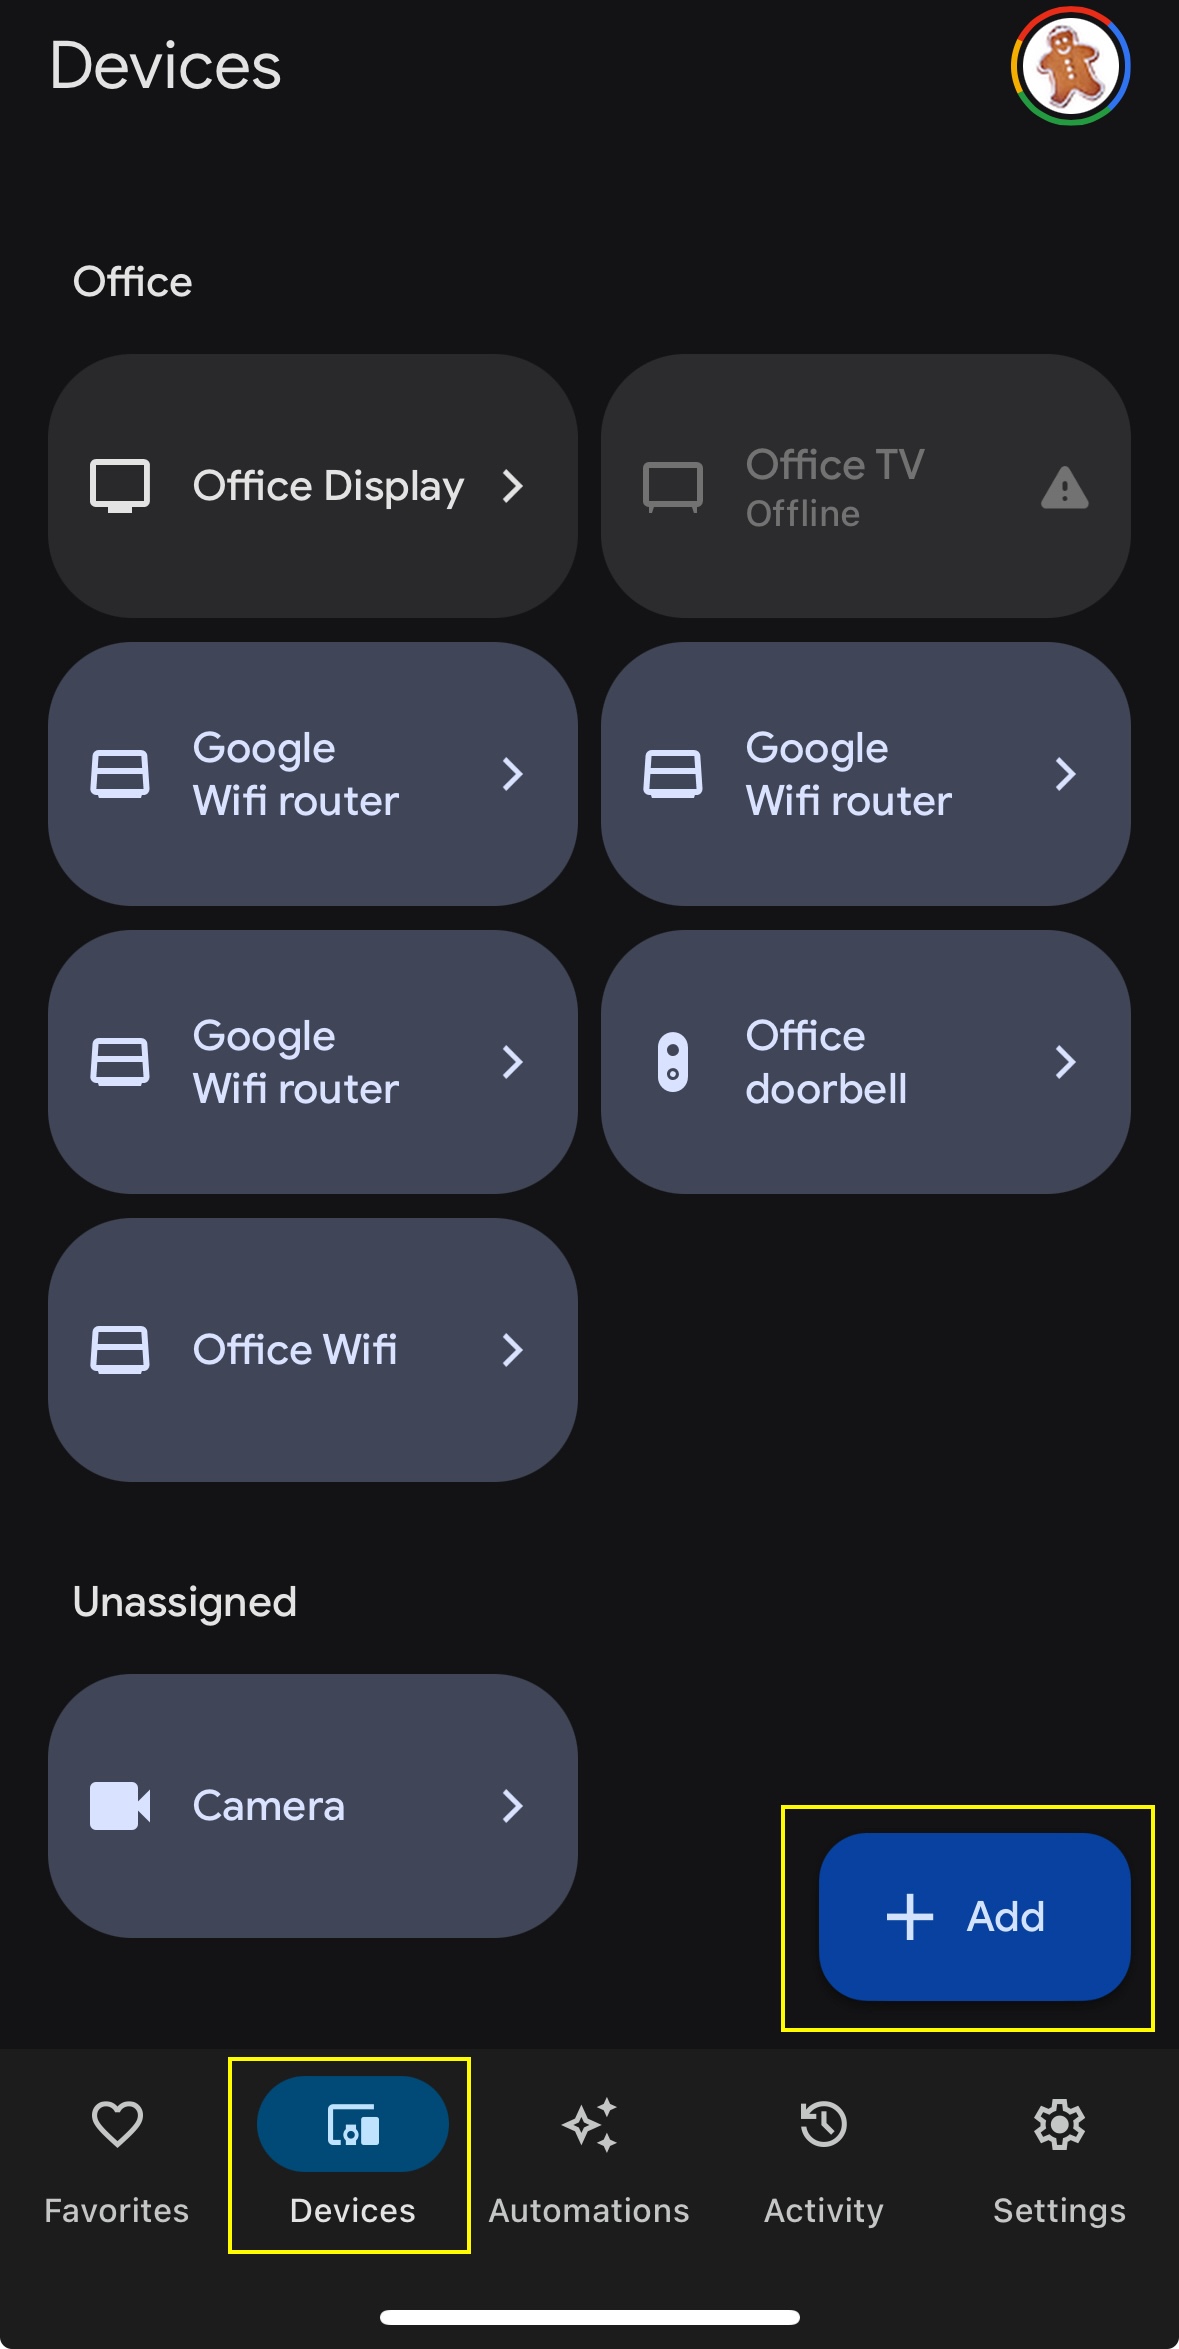
- Open the Google Home App, click on “Devices” at the bottom, and then click on the “+ Add” button, as shown below:
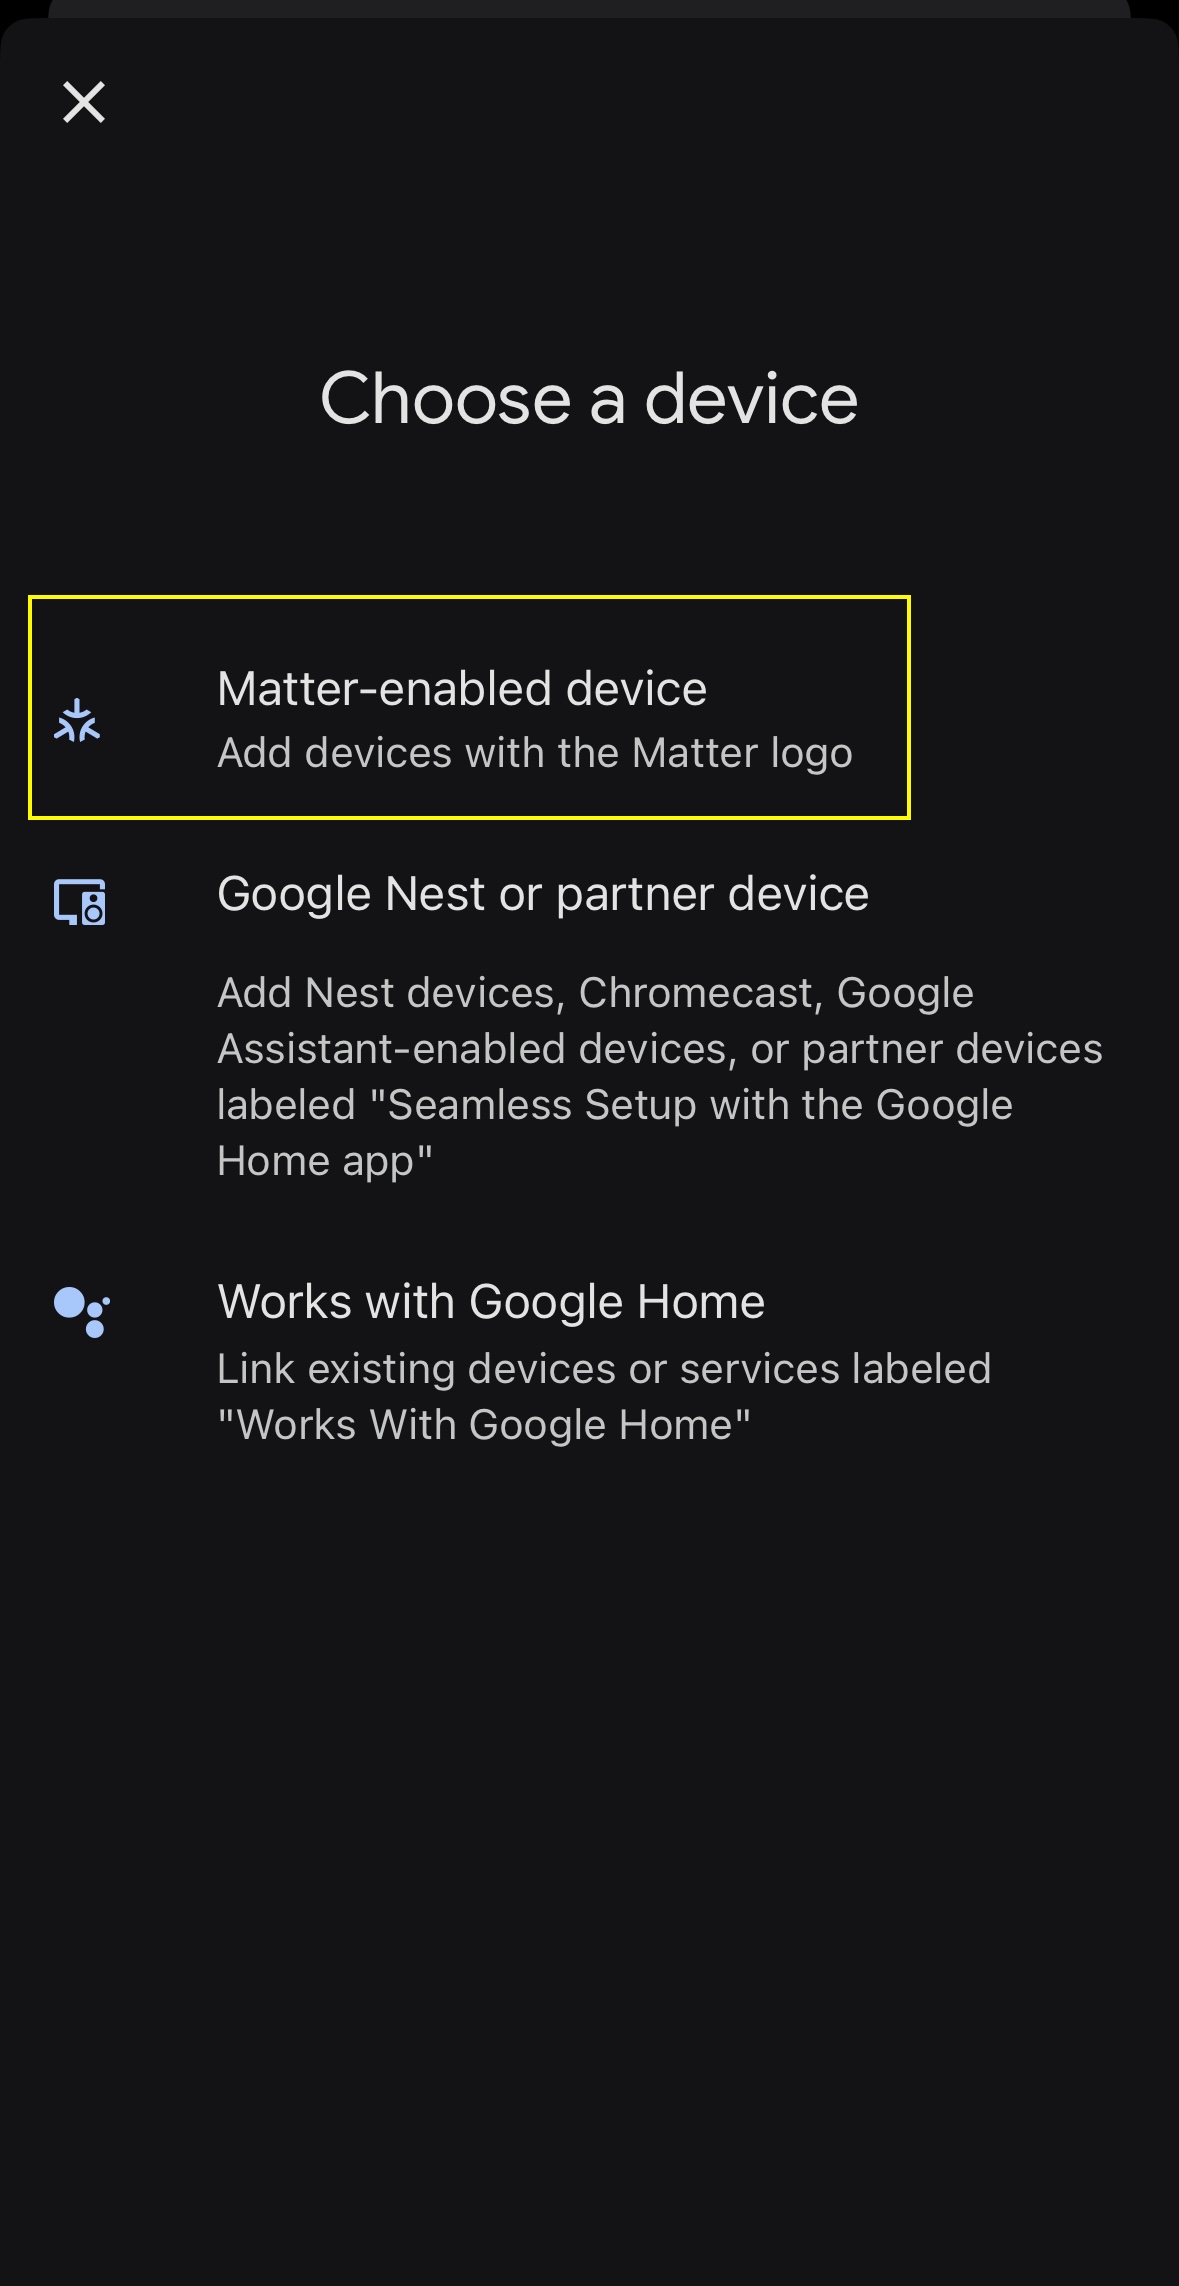
- In the following screen, click on “Matter-enabled device”:
- You should be presented with a screen asking you to scan the QR code. Scan the following QR code (retrieved from https://devzone.nordicsemi.com/nordic/nordic-blog/b/blog/posts/matter-testing-nrf-connect-sdk-platform-with-apple-google-and-samsung-ecosystems-218911247#mcetoc_1gkq29483l):
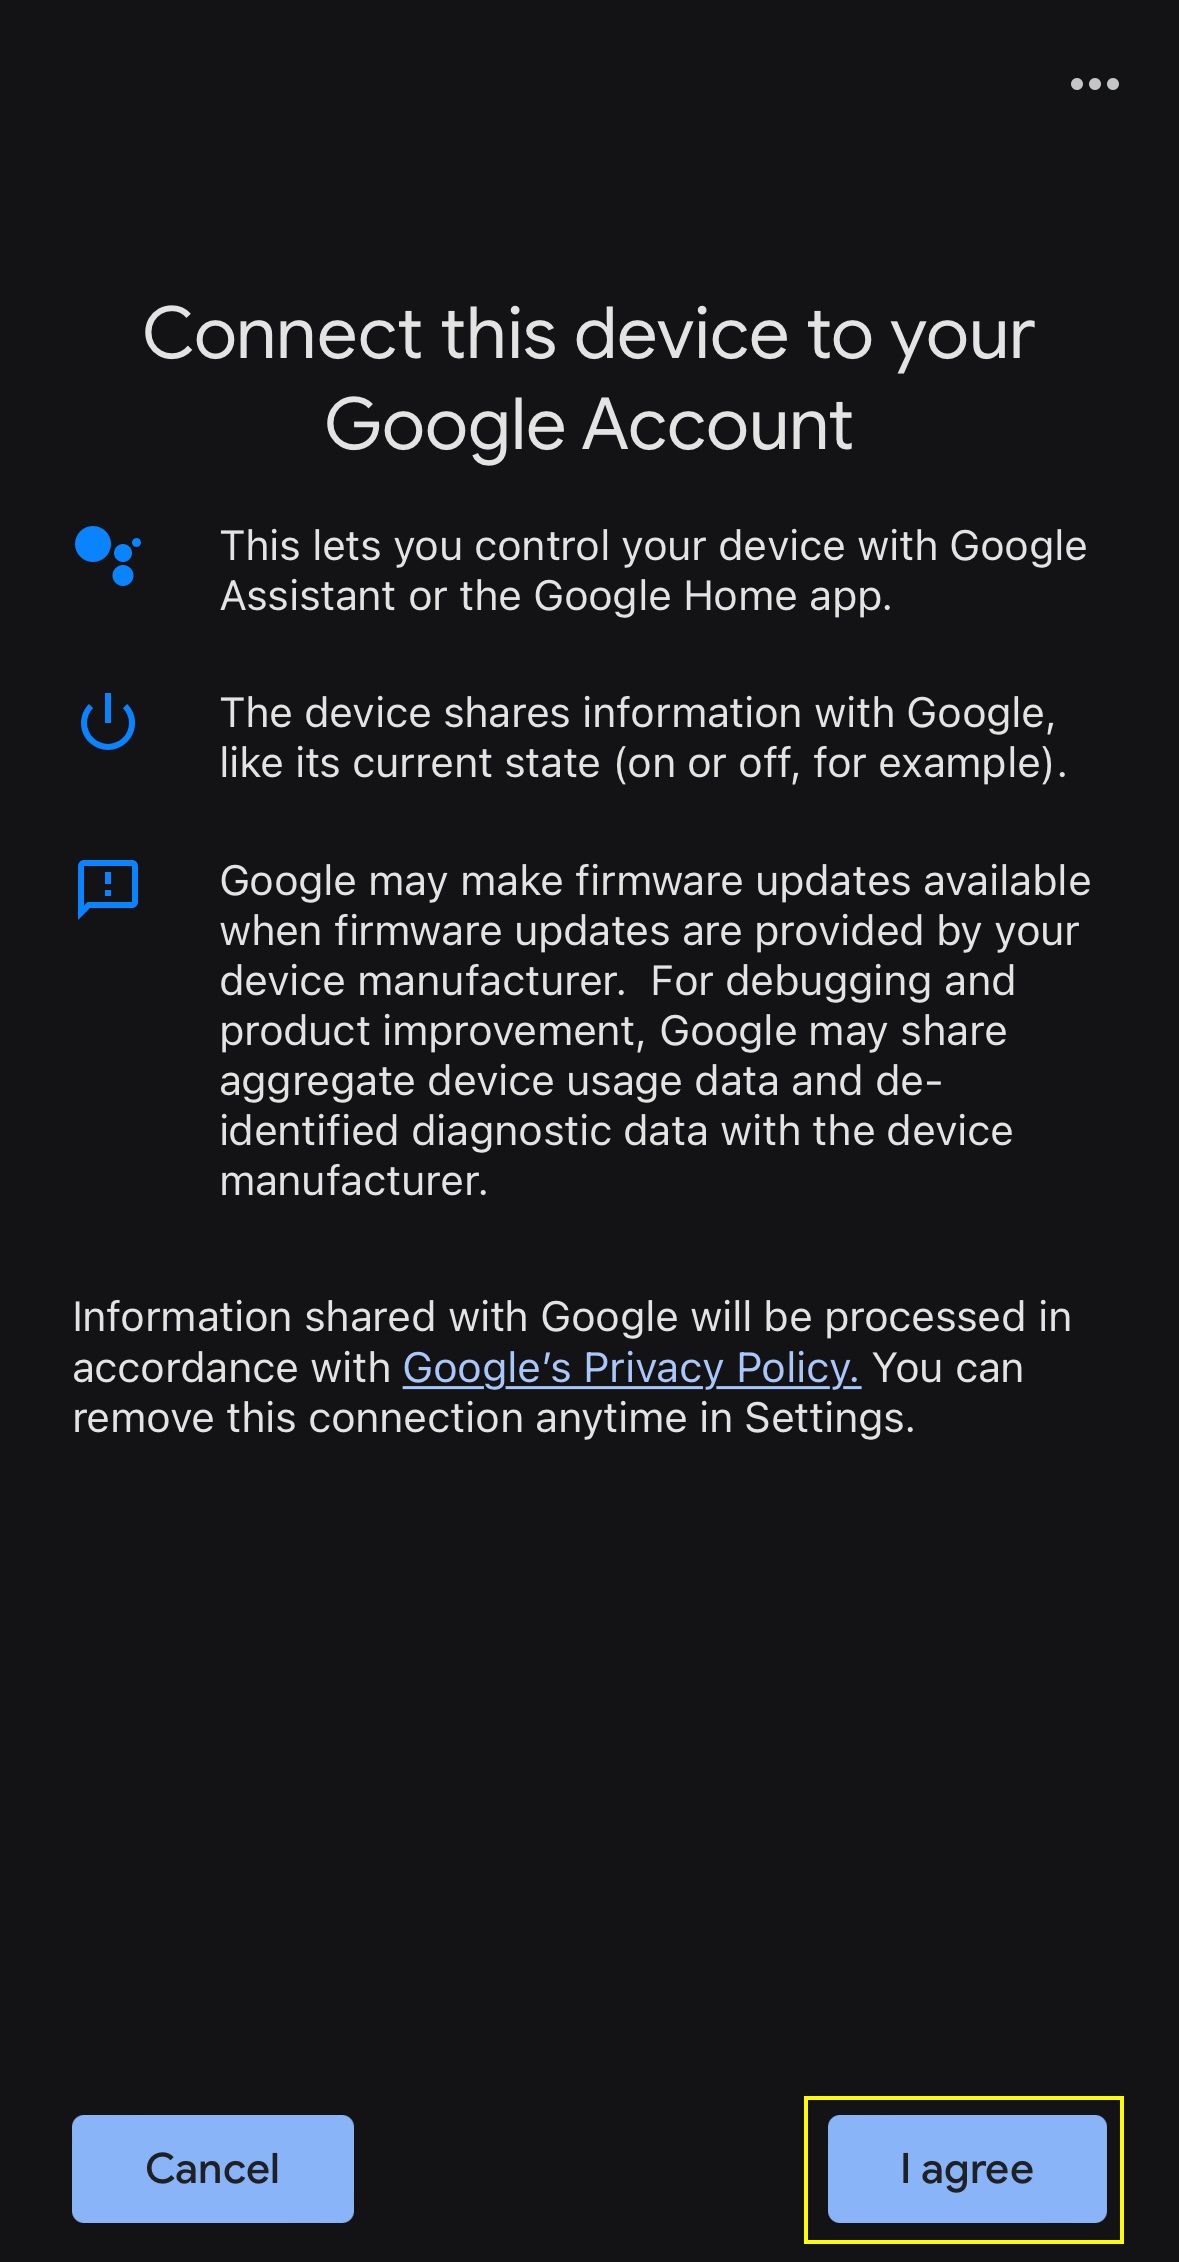
- As shown below, click on “I agree” on the subsequent screen to connect the device to your Google account:
- The Google Home app will add the device (if you have an iPhone, iOS may also add it).
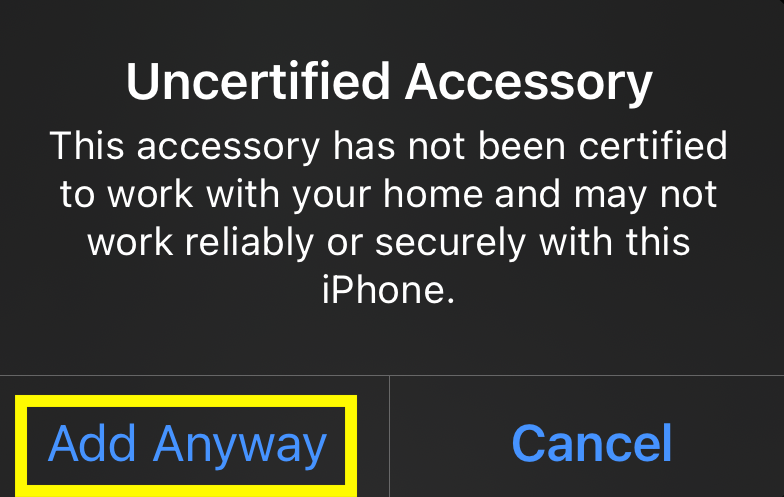
- Since the device hasn’t been certified with the CSA, iOS/Android may ask you to confirm whether you wish to add the device, as shown below:
- Then, give the device a name that you wish to appear on the main Google Home screen, and finally, select which room it is in.
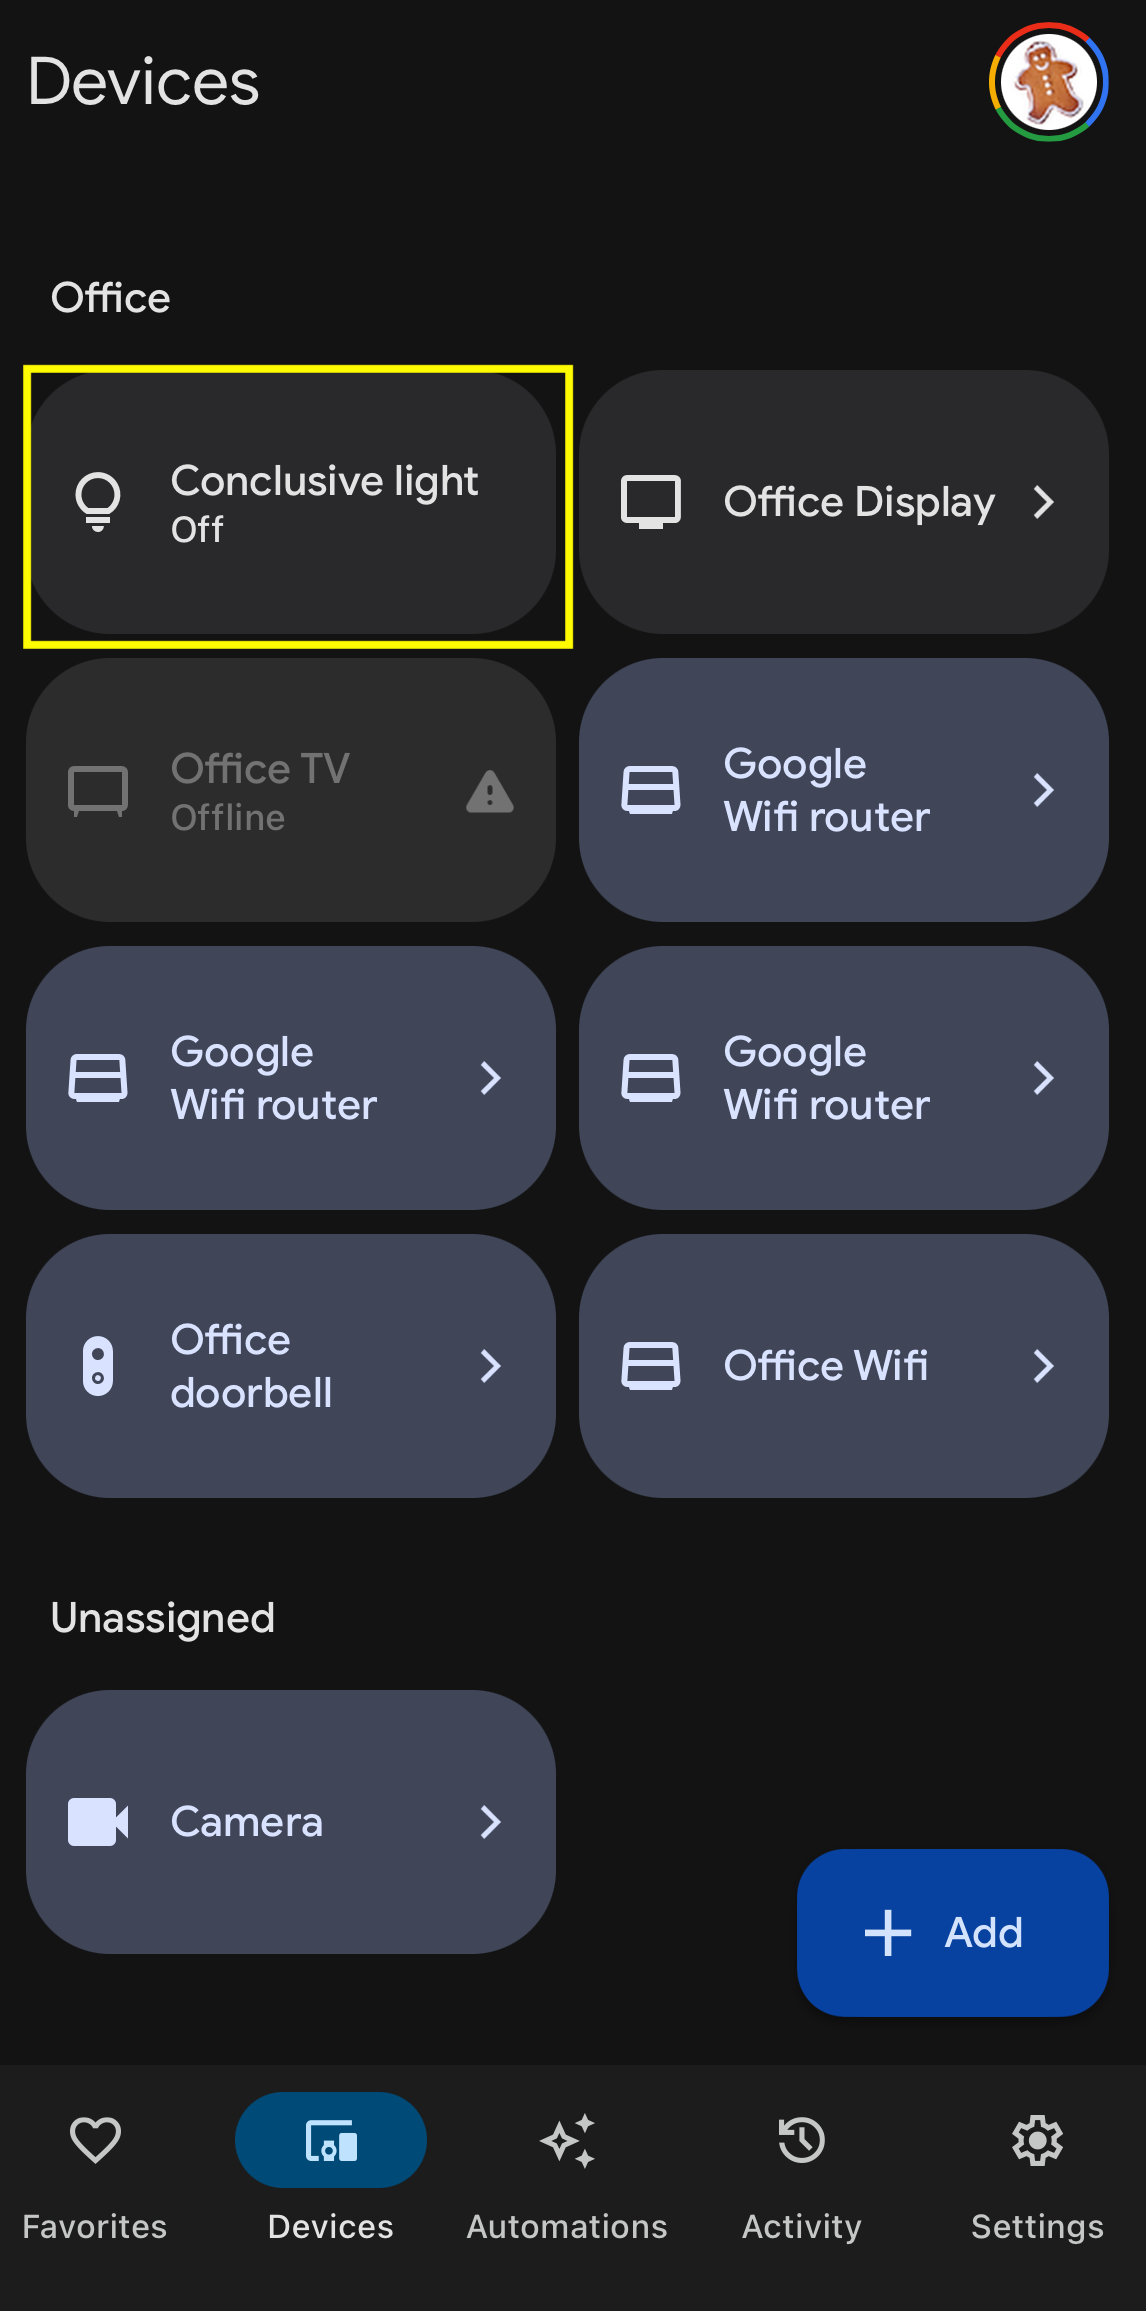
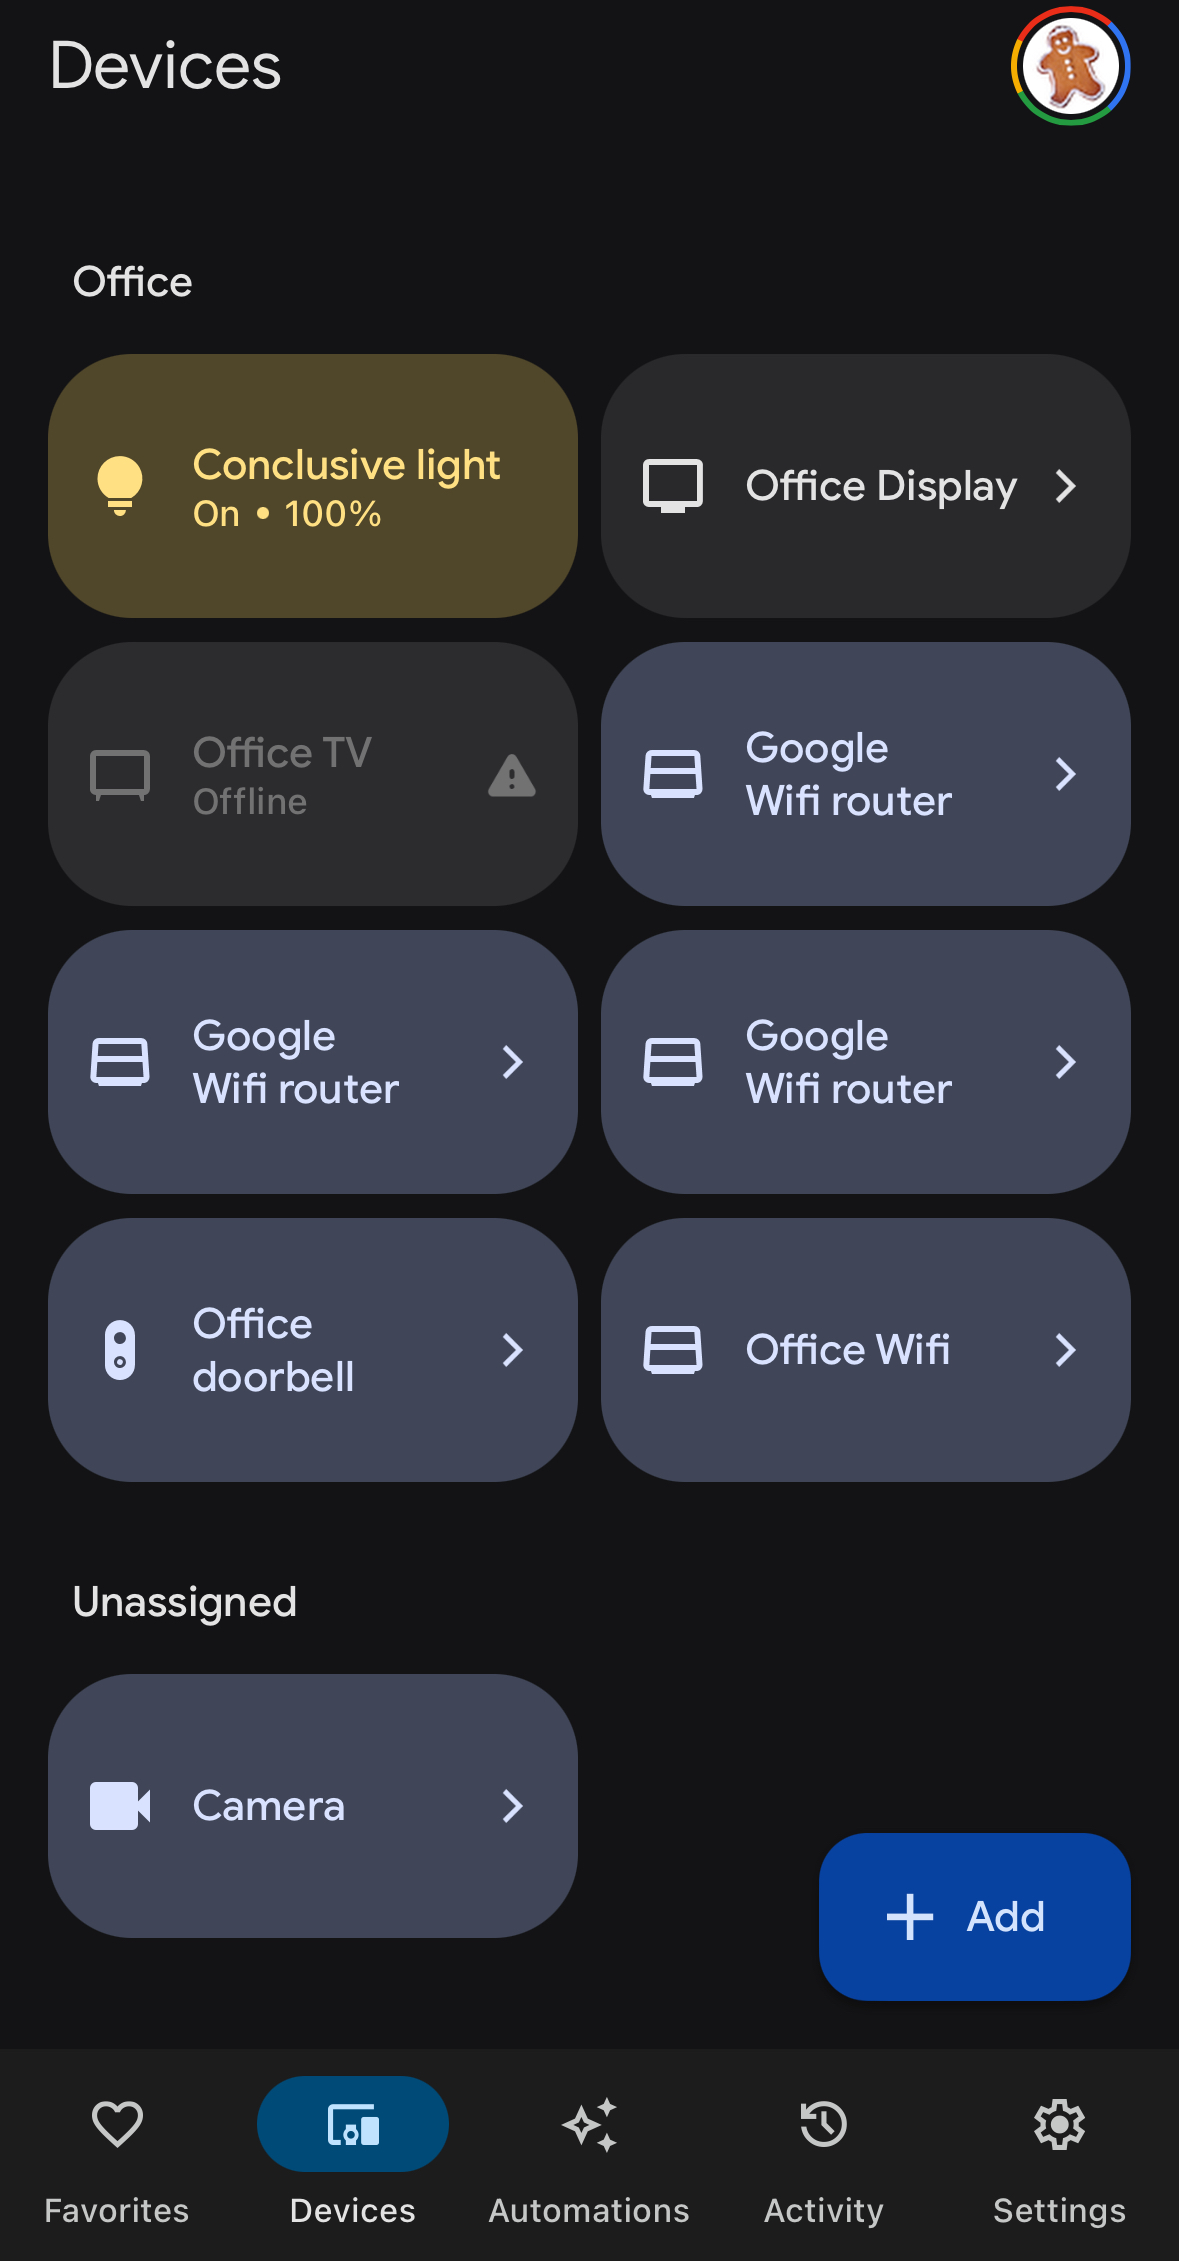
- You should see the device appear on the main Google Home screen, as shown below:
- If you click on the button for the light bulb we added, you should see the icon and the light bulb illuminate:

- If you click the icon again, you should see both the icon and the light bulb dim.
Conclusion
In this blog post, we learned about the different media the Matter standard can operate over and their advantages and disadvantages. We learned about certified devices, why they are essential, and why certification costs may be an obstacle for smaller organizations. Finally, we saw how to add a custom device developed by Conclusive Engineering to our Google Home ecosystem and control it using the Thread protocol with a Google Nest Hub 2nd generation.
Order smart home IoT solutions ->
This is the second chapter of our complete guide to Matter. If you found this article useful, check out the previous chapter and stay tuned for more.
